I always wanted to start a simple blog about some of more or less useful code I write in my spare time. To make it easy to maintain I chose github-pages as my hosting option.
Advantages
Github-Pages can be used to generate websites from markdown files and host them direktly on github. Using this, you can have a publicly available static website without any costs.
It even supports custom CNAME redirections, which is why you can read this blog at blog.philipp-manuel.de instead of mnlphlp.github.io/blog.
Additionally, for discussion/questions/ideas you can just open a new issue Here.
All those integrated features make it really easy to just throw some ideas in a Markdown file and make it into a website.
Setup
The following description gives an overview about how to setup a blog/website like this. For more in depth information you can find all the sources for this blog in this github repo.
Github Config
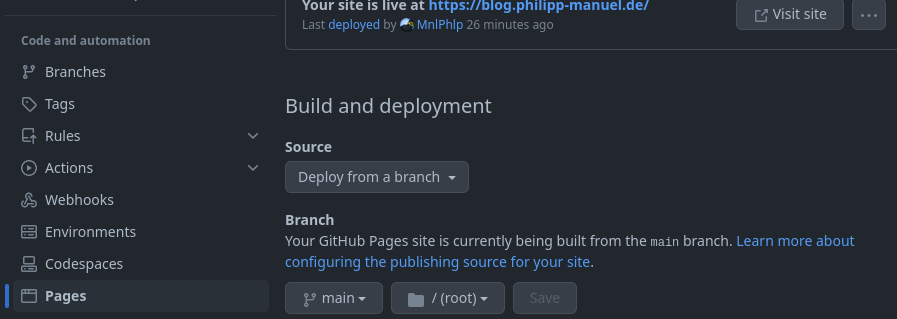
To create a github-pages site, you just have to create a new github repo, add an index.md file and turn on Deploy from a branch in the repository settings.
This is everything you need for a working website and it’s completely free.
Custom Domain
If you have a custom domain that you want to use, that can also be configured on the same page as the deployment branch.
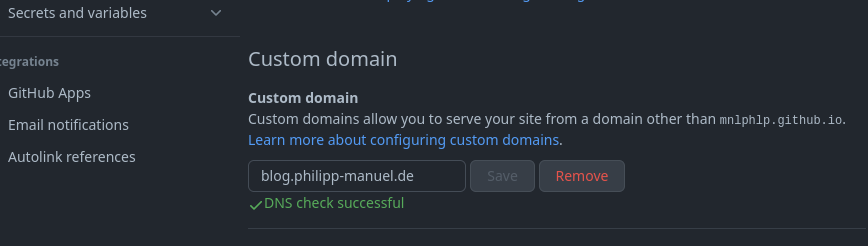
To be able to use a domain here, you have to first verify it in your Profile Settings
After that you just have to add a CNAME Record to your DNS to forward your custom domain to <your-username>.github.io and you are done.
In my case with a domain hosted by Netcup that entry looks like this:

Jekyll config
Github uses Jekyll to generate your website from the source code.
This generation can be configured by various files.
The main config is done in a file called _config.yml in the root of your repository.
For this blog it only contains the following two lines:
title: Blog
theme: jekyll-theme-midnight
You can find a list with all the themes supported by github-pages Here.
In addition to this general config, you can give every page some additional information in the Front Matter. For this post the Front Matter contains a layout, title and description.
---
layout: post
title: Writing A Blog On Github
description: How this blog works and what it is about
---
Layouts can be custom html files in a folder called _layouts in the root of your repository.
For this blog I copied and modified the default.html file from the midnight theme repo.
You can add as many layouts as you want and select them with layout: <filename> for each individual post.
Useful scripts
To make my life easier I also created some useful scripts to generate and publish new posts.
Draft.sh
#! /bin/bash

mkdir -p _drafts
# replace hyphen with space
title=$(echo $1 | tr - " ")
# make start of each word uppercase
title=$(echo $title | sed -e "s/\b\(.\)/\u\1/g")
echo -e "---\n\
layout: post\n\
title: $title\n\
description: generated draft\n\
---" > _drafts/$1.md
Running this script creates a new post draft, using the first commandline parameter as a name. The post title would be automatically generated from the file name, but I chose to specify it explicitly, so I can modify it later.
Preview.sh
#! /bin/bash

xdg-open http://localhost:4000 &
bundle exec jekyll serve --drafts
This script opens my default browser and points it to a local test instance of the blog. In order for this to work you have to do some more setup to be able to build your site locally. The setup is described in This Github doc
Publish.sh
#! /bin/bash

files="$(ls -A _drafts)"
select file in ${files}; do echo moving "${file}" to _posts;break; done

mv "_drafts/$file" "_posts/$(date +%Y-%m-%d)-$file"
Once I’ve previewed my post and want to post it, I run this script to move the file from _drafts to _posts and name it properly.
Then after one quick git push the post is public and ready to be read.